

Navigation
While the Tumblr Activity page is great for checking out your notes, we can’t really measure the activity on your blog page itself. That’s where Google Analytics comes in. It’s the best way to track stuff like:
- Number of blog visitors
- Visitor frequency
- Your most popular posts
- Search terms people used to find you
- Where your visitors are coming from
- Your blog’s height and weight
- And loads more.
Enable Custom Theme
Before you can use Google Analytics on your site, you’ll need to enable custom theme for your blog to be visible at yourblogname.tumblr.com. Once you’ve done that, you can follow the below instructions on how to get your Google Analytics code and add it to your blog theme. You can read more about how to customize your theme here.
Sign Up With Google Analytics
To get started, you’ll need to sign up on the Google Analytics site. Sign in or Sign up to get started.
If you already used Google Analytics with other sites, you can create a new account in your existing Google account. In your Google Analytics account, click the little gear icon on the left (Admin) and then click Create Account to create a new profile for the site you want to add Analytics to.
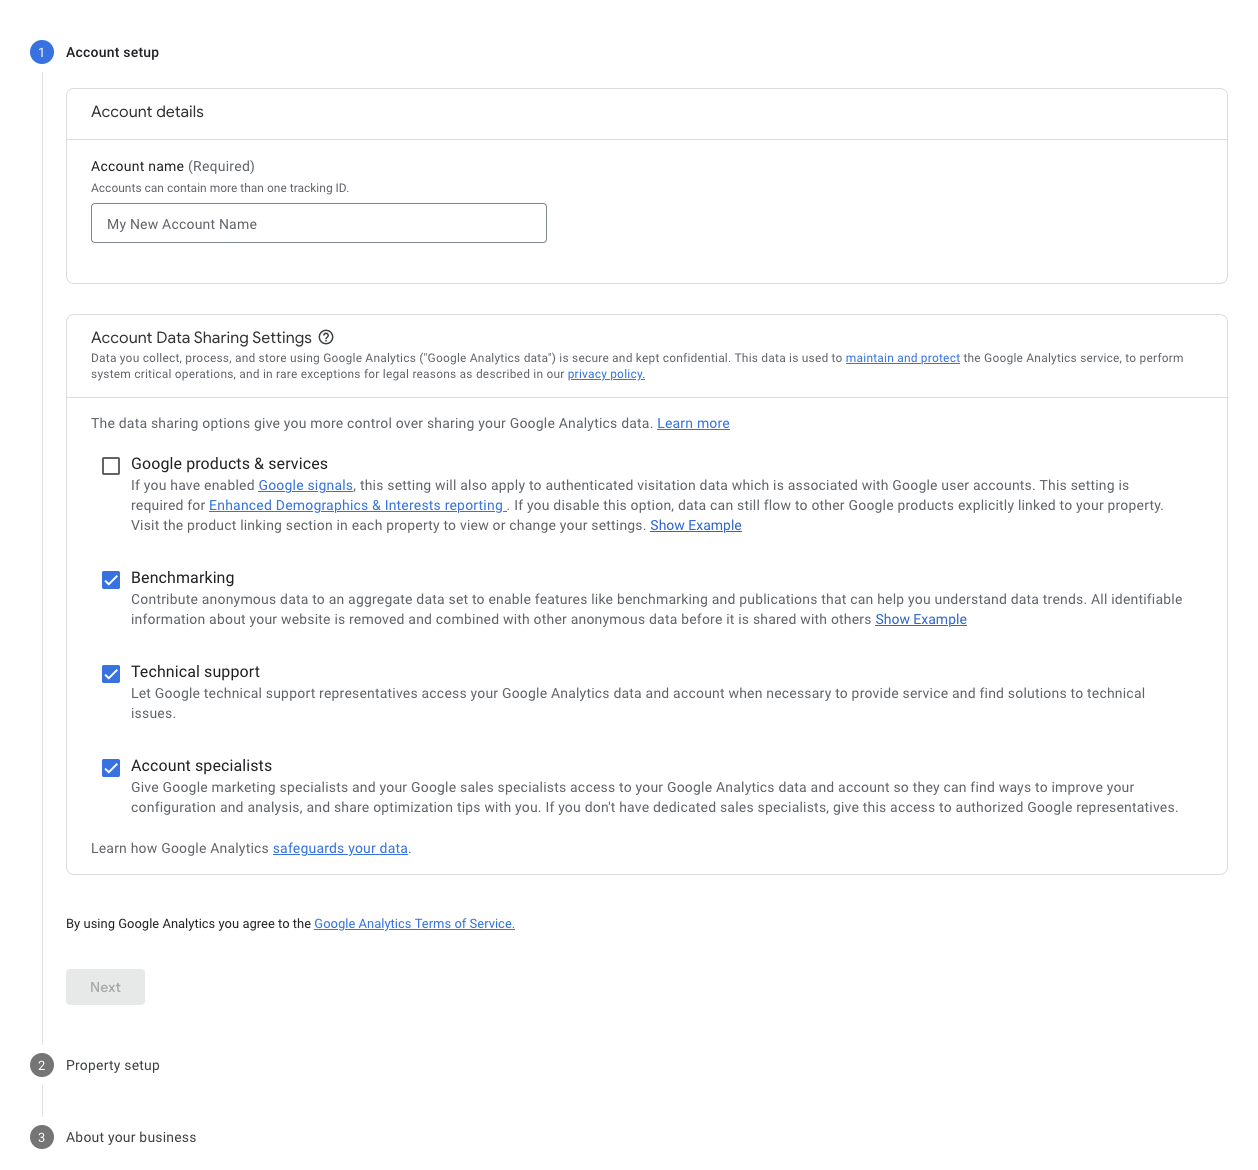
Be sure to fill in the “Account Name” for your new Google Analytics account.
Next, you can read the description for each setting to decide if you would like to opt out. When you’re ready, click Next.
You will then be taken to the Property Setup. On the Property Setup screen, fill in the following details:
- Property Name: Enter a name for your property, such as your site title.
- Reporting Time Zone: Choose the timezone you want the reporting of your website to be in.
- Currency: Choose the currency of the location you normally operate in.
On the next screens, fill in your business information and click Create.
A pop-up will appear with “Google Analytics Terms of Service Agreement” and “Additional Terms Applicable to Data Shared with Google”. You will need to click the checkbox for both and accept the terms to continue.
You will then be presented with this screen asking you to choose a property:
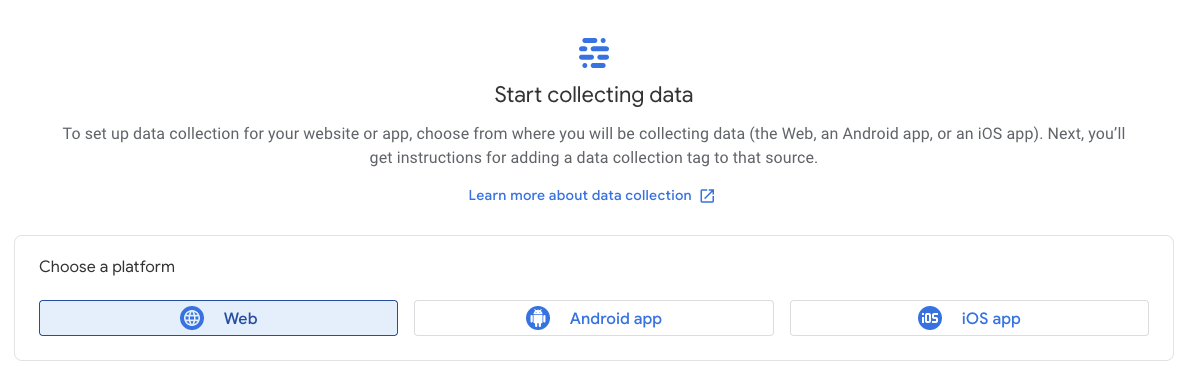
Choose Web and insert your website’s domain. Make sure to keep https:// selected. Type something in the Stream Name box (this can be your site’s title again) and click Create Stream.
Get Your Google Analytics Code
After following the steps in the previous section, you will be presented with this screen to install a Google tag on your site:
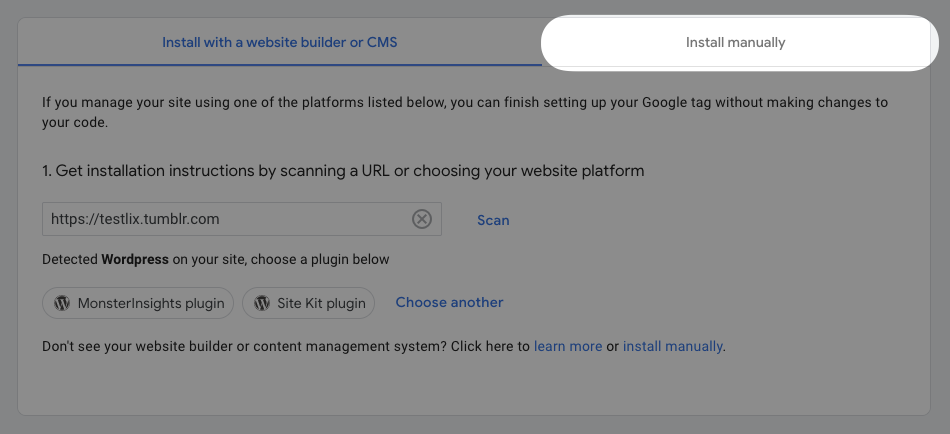
Click Install manually in the top tab or the link within the text at the bottom. You will then see your Google Analytics code that looks like this example:
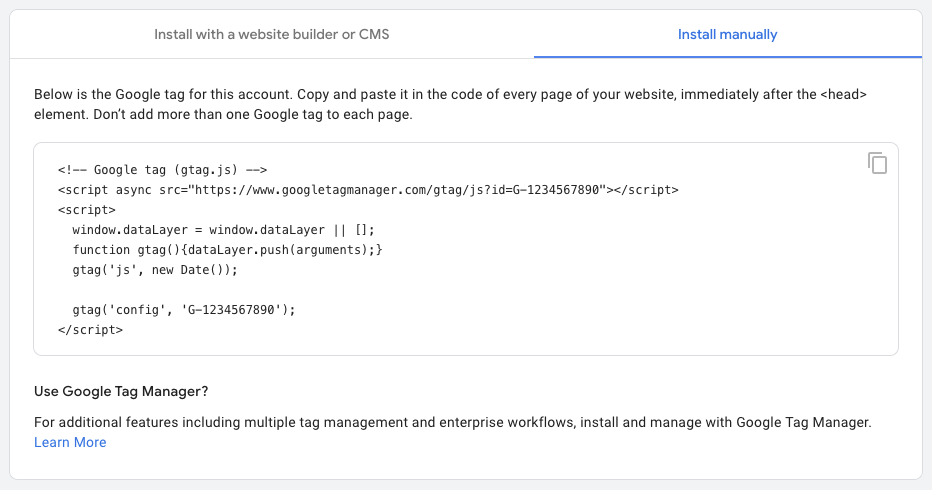
Copy this code, then paste it in your theme immediately after the <head> element.
To paste this into your theme:
- Click on “Settings” (the little gear icon) on the left, and select your blog on the right.
- Under “Custom Theme”, click “Edit theme”. (If that option is not available to you, you first have to toggle “Enable custom theme”.)
- Then, in the Customizer click “Edit HTML” and search for the
<head>element.
Themes with Google Analytics ID Options
Some custom themes may come with a Google Analytics ID option in your theme options that lets you add your Measurement ID. In these cases, all you need to do is get your Measurement ID in Admin > Data Streams. Copy it and paste it into your Google Analytics theme options field. Your Measurement ID will look something like this: G-1234567890.
If you find that’s it’s not working, it’s possible that your theme is not yet updated to use Google Analytics 4 (GA4). If that’s the case, please locate the Google Analytics code in your theme code and replace it with the above code. If you’re having issues with this in your theme, please contact your theme developer.
Troubleshooting
If you’re still using Universal Analytics and need to make the switch to Google Analytics 4, visit the guide from Google to Add a Google Analytics 4 property (to a site that already has Analytics).
Note that if your Google Analytics status reads “Tracking code not verified,” this means Google’s system has not processed your data yet. It may take up to 48 hours for you to start receiving data. If you continue having trouble, visit the Google Analytics help page.
