
This guide shows how to set up single sign-on (SSO) between Keycloak and your Cloud Identity or Google Workspace account by using SAML federation. The document assumes you have installed and are using Keycloak.
Objectives
- Configure your Keycloak server so that it can be used as an identity provider (IdP) by Cloud Identity or Google Workspace.
- Configure your Cloud Identity or Google Workspace account so that it uses Keycloak for SSO.
Before you begin
- If you don't have a Cloud Identity account, sign up for an account.
- Make sure your Cloud Identity account has super-admin privileges.
- If your Keycloak server is used to manage more than one realm, decide which realm you want to use for the federation.
- Ensure that you have admin access to the selected realm.
Create a SAML profile
To configure single sign-on with Keycloak, you first create a SAML profile in your Cloud Identity or Google Workspace account. The SAML profile contains the settings related to your Keycloak server, including its URL and signing certificate.
You later assign the SAML profile to certain groups or organizational units.
To create a new SAML profile in your Cloud Identity or Google Workspace account, do the following:
In the Admin Console, go to Security > Authentication > SSO with third-party IdP.
Click Third-party SSO profiles > Add SAML profile.
On the SAML SSO profile page, enter the following settings:
- Name:
Keycloak IDP entity ID:
Keycloak 17 or later
https://KEYCLOAK/realms/REALM
Keycloak 16 or earlier
https://KEYCLOAK/auth/realms/REALM
Sign-in page URL:
Keycloak 17 or later
https://KEYCLOAK/realms/REALM/protocol/saml
Keycloak 16 or earlier
https://KEYCLOAK/auth/realms/REALM/protocol/saml
Sign-out page URL:
Keycloak 17 or later
https://KEYCLOAK/realms/REALM/protocol/openid-connect/logout
Keycloak 16 or earlier
https://KEYCLOAK/auth/realms/REALM/protocol/openid-connect/logout?redirect_uri=https://KEYCLOAK/auth/realms/REALM/account/
Change password URL:
Keycloak 17 or later
https://KEYCLOAK/realms/REALM/account
Keycloak 16 or earlier
https://KEYCLOAK/auth/realms/REALM/account
In all URLs, replace the following:
KEYCLOAK: the fully qualified domain name of your Keycloak serverREALM: the name of your selected realm
Don't upload a verification certificate yet.
- Name:
Click Save.
The SAML SSO profile page that appears contains two URLs:
- Entity ID
- ACS URL
You need these URLs in the next section when you configure Keycloak.
Configure Keycloak
You configure your Keycloak server by creating a client.
Create a client
Create a new SAML client in Keycloak:
- Sign in to Keycloak and open the administration console.
- Select the realm that you want to use for federation.
- In the menu, select Clients.
- Click Create client.
Configure the following settings for the client:
Keycloak 19 or later
- Client type: SAML
- Client ID: Entity URL from your SSO profile.
- Name:
Google Cloud
Keycloak 18 or earlier
- Client ID: Entity URL from your SSO profile.
- Client Protocol: saml
- Client SAML Endpoint: leave blank
Click Save.
Specify the details for the client by configuring the following settings:
Keycloak 19 or later
On the Settings tab:
- Valid Redirect URIs: ACS URL from your SSO profile
- Name ID Format: email
- Force Name ID Format: on
- Sign documents: off
- Sign Assertions: on
On the Keys tab:
- Client Signature Required: off
Keycloak 18 or earlier
- Name: A name such as
Google Cloud - Sign Assertions: on
- Client Signature Required: off
- Force Name ID Format: on
- Name ID Format: email
- Valid Redirect URIs: ACS URL from your SSO profile
Keep the default values for all other settings.
Click Save.
Export the signing certificate
After Keycloak authenticates a user, it passes a SAML assertion to Cloud Identity or Google Workspace. To enable Cloud Identity and Google Workspace to verify the integrity and authenticity of that assertion, Keycloak signs the assertion with a special token-signing key and provides a certificate that enables Cloud Identity or Google Workspace to check the signature.
You now export the signing certificate from Keycloak:
- In the menu, select Realm settings.
- Select the Keys tab.
Find the row for Algorithm: RS256. If is more than one row, use the one with Use: SIG. Then select Certificate.
A dialog that contains a base64-encoded certificate appears.
Copy the base64-encoded certificate value to the clipboard.
Before you can use the signing certificate, you must convert it into PEM format by adding a header and footer.
- Open a text editor such as Notepad or vim.
Paste the following header, followed by a newline:
-----BEGIN CERTIFICATE-----
Paste the base64-encoded certificate from the clipboard.
Add a newline and paste the following footer:
-----END CERTIFICATE-----
After the change, the file looks similar to the following:
-----BEGIN CERTIFICATE-----
MIICmzCCAYMCBgF7v8/V1TANBgkq...
-----END CERTIFICATE-----
Save the file to a temporary location on your computer.
Complete the SAML profile
You use the signing certificate to complete the configuration of your SAML profile:
Return to the Admin Console and go to Security > Authentication > SSO with third-party IdP.
Open the
KeycloakSAML profile that you created earlier.Click the IDP details section to edit the settings.
Click Upload certificate and pick the token signing certificate that you downloaded previously.
Click Save.
Your SAML profile is complete, but you still need to assign it.
Assign the SAML profile
Select the users for which the new SAML profile should apply:
In the Admin Console, on the SSO with third-party IDPs page, click Manage SSO profile assignments > Manage.
In the left pane, select the group or organizational unit for which you want to apply the SSO profile. To apply the profile to all users, select the root organizational unit.
In the right pane, select Another SSO profile.
In the menu, select the
Keycloak - SAMLSSO profile that you created earlier.Click Save.
Repeat the steps to assign the SAML profile to another group or organizational unit.
Test single sign-on
You've completed the single sign-on configuration. You can now check whether SSO works as intended.
Choose a Keycloak user that satisfies the following criteria:
- The user has an email address.
- The email address corresponds to the primary email address of an existing user in your Cloud Identity or Google Workspace account.
The Cloud Identity user does not have super-admin privileges.
User accounts that have super-admin privileges must always sign in by using Google credentials, so they aren't suitable for testing single sign-on.
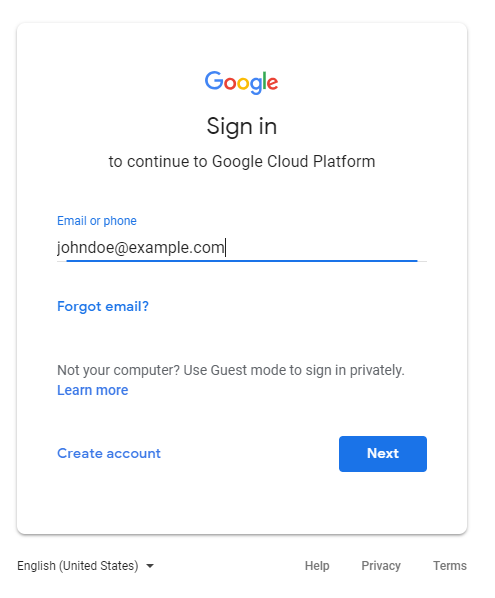
Open a new browser window and go to the Google Cloud console.
On the Google sign-in page, enter the email address of the user account, and then click Next.
You are redirected to Keycloak.
Enter your Keycloak credentials, and then click Sign in.
After successful authentication, Keycloak redirects you back to the Google Cloud console. Because this is the first login for this user, you're asked to accept the Google terms of service and privacy policy.
If you agree to the terms, click Accept.
You are redirected to the Google Cloud console, which asks you to confirm preferences and accept the Google Cloud terms of service. If you agree to the terms, click Yes, and then click Agree and Continue.
Click the avatar icon, and then click Sign out.
You are redirected to Keycloak.
If you have trouble signing in, keep in mind that user accounts with super-admin privileges can bypass SSO, so you can still use the Admin console to verify or change settings.
Optional: Configure redirects for domain-specific service URLs
When you link to the Google Cloud console from internal portals or documents, you can improve the user experience by using domain-specific service URLs.
Unlike regular service URLs such as https://console.cloud.google.com/,
domain specific-service URLs include the name of your primary domain. Unauthenticated
users that click a link to a domain specific-service URL are immediately redirected
to Keycloak instead of being shown a Google sign-in page first.
Examples for domain-specific service URLs include the following:
| Google service | URL | Logo |
|---|---|---|
| Google Cloud console | https://www.google.com/a/DOMAIN/ServiceLogin?continue=https://console.cloud.google.com |
 |
| Google Docs | https://docs.google.com/a/DOMAIN |
 |
| Google Sheets | https://www.google.com/a/DOMAIN/ServiceLogin?continue=https://sheets.google.com
|
 |
| Google Sites | https://www.google.com/a/DOMAIN/ServiceLogin?continue=https://slides.google.com |
 |
| Google Drive | https://drive.google.com/a/DOMAIN |
 |
| Gmail | https://mail.google.com/a/DOMAIN |
 |
| Google Groups | https://www.google.com/a/DOMAIN/ServiceLogin?continue=https://groups.google.com |
 |
| Google Keep | https://www.google.com/a/DOMAIN/ServiceLogin?continue=https://keep.google.com
|
 |
| Looker Studio | https://www.google.com/a/DOMAIN/ServiceLogin?continue=https://lookerstudio.google.com |
 |
To configure domain-specific service URLs so that they redirect to Keycloak, do the following:
In the Admin Console, on the SSO with third-party IDPs page, click Domain-specific service URLs > Edit.
Set Automatically redirect users to the third-party IdP in the following SSO profile to enabled.
Set SSO profile to
Keycloak.Click Save.
Optional: Configure login challenges
Google sign-in might ask users for additional verification when they sign in from unknown devices or when their sign-in attempt looks suspicious for other reasons. These login challenges help improve security and we recommend to leave login challenges enabled.
If you find that login challenges cause too much friction, you can disable login challenges by doing the following:
- In the Admin Console, go to Security > Authentication > Login challenges.
- In the left pane, select an organizational unit for which you want to disable login challenges. To disable login challenges for all users, select the root organizational unit.
- Under Settings for users signing in using other SSO profiles, select Don't ask users for additional verifications from Google.
- Click Save.
What's next
- Learn more about Identity and Access Management (IAM).
- Read about best practices for setting up an enterprise organization in Google Cloud.