

1. Before you begin
Geospatial Creator in Unity, powered by ARCore and Photorealistic 3D Tiles from Google Maps Platform, lets you quickly build and visualize augmented-reality (AR) experiences for a specific latitude and longitude, all within the Unity Editor. This can greatly reduce the amount of time it takes to build a single geolocated AR scene for your app, but what if you want to create several similar experiences at different locations? Using the C# API in Geospatial Creator, you can do this as well.
In this codelab, you will write C# code that uses Geospatial Creator and the Places API from Google Maps Platform to create multiple geospatial experiences using an initial template. The resulting experiences can be explored and fine-tuned in the Unity Editor before being compiled into an app.

Prerequisites
- Basic knowledge of AR
- Basic knowledge of the ARCore Geospatial API
What you'll learn
- How to use APIs in Geospatial Creator to create and visualize one geolocated experience in multiple locations.
- How to use the Places API from Google Maps Platform to find the locations of places.
- How to run the AR experience on your device.
What you'll need
2. Set up your environment
To use Geospatial Creator, you need to set up authorization to access Photorealistic 3D Tiles, ARCore services on Google Cloud, and the Places API from Google Maps Platform.
Set up a Google Cloud project
This codelab requires a Google Cloud project with billing enabled in order to access Google's server APIs. Billing setup is required for this codelab, but you will only be charged if a project exceeds its quota of no-charge services.
To set up a project in Google Cloud, follow these steps:
- Create a project in Google Cloud console.

- In the Project name text box, enter an appropriate name, such as
ARCore Geospatial Project, and then choose any location. - Click Create.
- In the Google Cloud console on the project-selector page, click Create Project.
- See Enable billing, and review pricing for Photorealistic 3D Tiles and pricing for the Places API (New).
Enable the Map Tiles API
The Map Tiles API provides the Photorealistic 3D Tiles, which are visible in the Unity Editor.
Enable the ARCore API
The ARCore API on Google Cloud lets you access the ARCore Geospatial API on the target device.
Enable the Places API
The Places API from Google Maps Platform lets you get location data for over 200 million places, which you will use in the codelab to find related places. This API provides search results and geographical coordinates for places.
Create an API key for your project
To use API key authentication to authenticate your app with the remote Google Cloud services, follow these steps:
- In Google Cloud console under APIs & services, select Credentials.
- At the top of the page, click Create Credentials, and then select API Key.
- Note the key because you need it for the next steps.
Set up the software
To get started with the Geospatial Creator software, follow these steps:
- Clone this repository.
- Download Unity Hub and use it to install Unity version 2022.3. Ensure that you are installing either the Android or iOS optional build tools.
- In Unity Hub, press Add > Add project from disk.
- In the Hierarchy panel, select AR Geospatial Creator Origin.
- In the Google Maps Tile API Key text box, insert the API key, and then press
Enter(orreturnon macOS).
- In Edit > Project Settings > XR Plug-in Management > ARCore Extensions, use API Key authentication for either Android or iOS and insert the API Key.
- In File > Build Settings, switch the target platform to either Android or iOS.
3. Create your first anchor
In this codelab, you create an AR anchor that can be used in multiple locations. You use public libraries in San Francisco, California, as an example, but feel free to use locations near you.
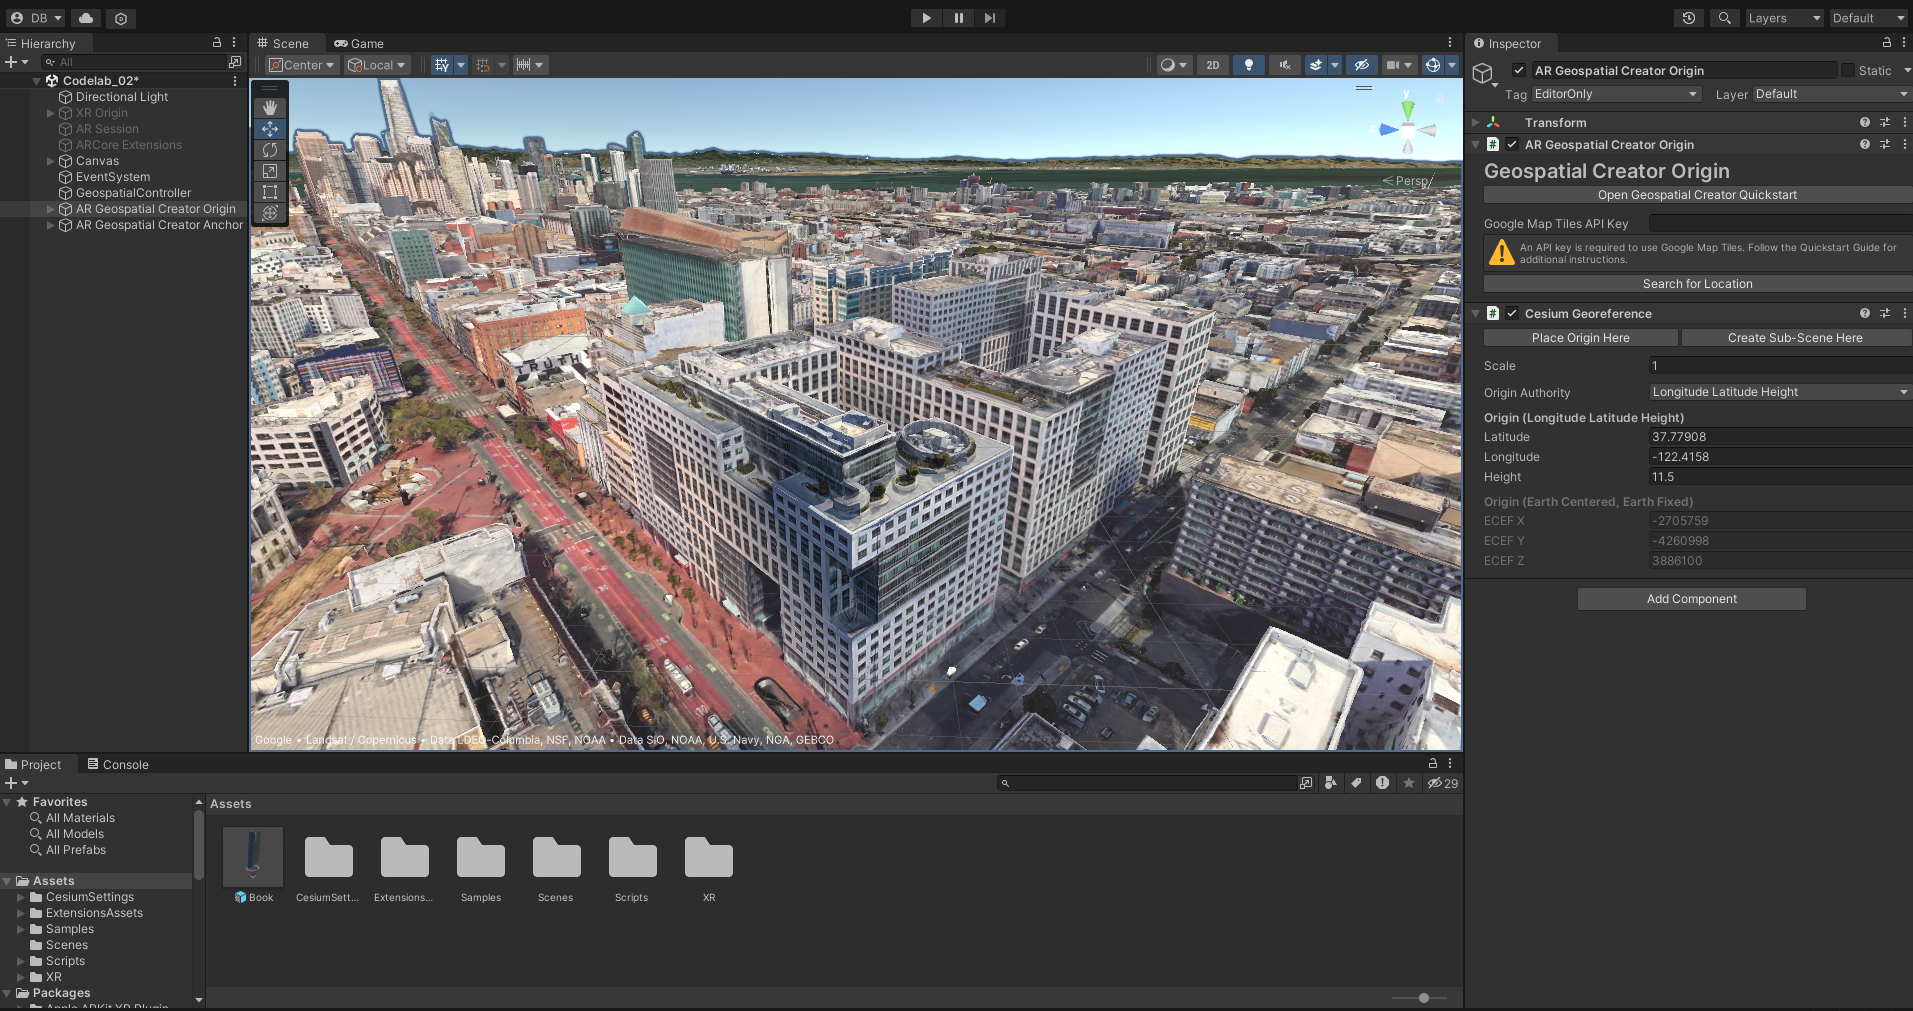
About Geospatial Creator's Origin component
Each Unity scene built with Geospatial Creator requires exactly one Geospatial Creator Origin. This game object is the reference point for converting real-world latitude, longitude, and altitude values to Unity game coordinates.
The sample project contains a Geospatial Creator Origin, which uses Cesium to render Photorealistic 3D Tiles in the Editor's Scene view and lets you visualize exactly where in the world your AR content will appear.
Move the Origin
Move the Geospatial Creator origin to the latitude and longitude of the San Francisco main library branch.
To use Geospatial Creator's built-in integration with the Places API to automatically relocate the origin to the correct location, follow these steps:
- In the Hierarchy panel, select the Geospatial Creator Origin game object.
- In the Inspector panel, click Search for Location.
- In the search dialog, type
San Francisco Public Library. The first result should be at 100 Larkin Street. - Click Apply to objects to apply the search result to the origin. You should see that the origin's latitude and longitude update to the new coordinates.
Add a Geospatial Creator anchor to the scene
Now that an Origin exists, add a Geospatial Creator anchor using GameObject > XR > AR Geospatial Creator Anchor. By default, the anchor will be co-located with the origin.
Use this anchor to position our 3D AR content. A 3D model of a book is included with the sample project.
To place the book in your scene, follow these steps:
- In the Project panel, drag the Book model into the Editor view pane.
- In the Hierarchy panel, ensure that the Book is a child of the anchor you created earlier. Any child game object of the Geospatial Creator anchor will be positioned relative to the anchor.
- In the Hierarchy panel, select the Book. Set its position values to 0, 0, 0.

When looking at this model in the Editor view, it is apparent that something is wrong: The default altitude of the anchor is below the library's roof surface, while it should float high above it.
While you could move the object in the editor to find the approximate WGS84 altitude, it is preferred to configure Geospatial anchors as a Rooftop anchor in this situation to have their altitude automatically fixed relative to the roof of the structure which they are above.
- To do this, open the anchor's inspector panel and set the
Altitude Typeproperty toRooftop.
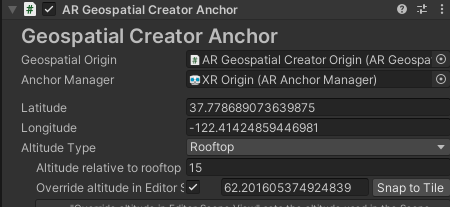
After doing this, note that the anchor's altitude doesn't change in the Editor view. This is because the anchor's altitude is determined at runtime when the anchor is resolved for Rooftop and Terrain anchors. To visualize the anchor on the rooftop in the Scene view, you can use the Snap To Tile button. This sets the anchor's altitude to match the tile in the Scene view, while not affecting the altitude of the resolved anchor at runtime.
- To have the model float above the library rooftop instead of resting on it, change the
Altitude relative to rooftopparameter to be 15 meters above the rooftop.
The model is now floating nicely over the library!
Your project now has a complete Geospatial AR scene, including all the required AR system components, a Geospatial Creator Origin, and one anchor with an attached model.
Next, make duplicate anchors at additional library locations.
4. Find new anchor locations with the Places API
The Places API from Google Maps Platform lets you get location data for over 200 million places. In this codelab, you use this API to find other branches of public libraries in San Francisco and use those results to generate a Geospatial Creator anchor for the next ten search results.
- To begin, click Assets > Scripts > Editor and then open the ‘
AnchorDuplicator.cs' file. This file provides some boilerplate code that helps you get started with the Places API and parse its results.
Authenticate with the Places API
- Locate the following line in the
AnchorDuplicatorclass:private const string API_KEY = "<YOUR_API_KEY_HERE>"; - Replace <YOUR_API_KEY_HERE> with the key obtained in the setup steps.
Query the Places API for a search term
With the Places API authorization setup completed, you can write code that initiates a POST request.
- To do so, find the
CreatePlacesRequestmethod and use the following method definition:
Now, when thestring postBody = "{ \"textQuery\": \"" + searchTerm + "\", " + " \"locationBias\": { \"circle\": { " + " \"center\": { \"latitude\": " + lat + ", \"longitude\": " + lon + " }, " + " \"radius\": 10000 }" + " }" + "}"; string url = "https://places.googleapis.com/v1/places:searchText"; UnityWebRequest request = UnityWebRequest.Post(url, postBody, "application/json"); request.SetRequestHeader("X-Goog-Api-Key", apiKey); request.SetRequestHeader("X-Goog-FieldMask", "places.displayName,places.location"); return request;CreatePlacesRequestmethod is called, a request is made that searches forsearchTermin a circle centered aroundlatandlon.
Test your work
Before you continue, you need to verify that the calls to the Places API are successful.
- Run the functions in the Unity Editor:
- In Google AR Codelab, click Run Places Request.
- Open the Unity console. You should see results appear.

5. Programmatically add anchors to places
Now that you have verified that the Places API finds results, create new Geospatial Creator anchors at each location specified by the results.
Create a menu item
- In the
AnchorDuplicatorclass, find theCreateNewAnchorsFromPlacesmethod and use the following method definition:
This menu item checks a previously started request and uses the firstif (_places == null) { Debug.LogError("Cannot create anchors: Places has not been initialized."); return; } // You start with only one anchor in the scene, which you want to copy: var prototypeAnchorObject = GameObject .FindObjectOfType<ARGeospatialCreatorAnchor>() .gameObject; foreach (var place in _places) { var newAnchorObject = GameObject.Instantiate(prototypeAnchorObject); var anchor = newAnchorObject.GetComponent<ARGeospatialCreatorAnchor>(); anchor.Latitude = place.location.latitude; anchor.Longitude = place.location.longitude; newAnchorObject.name = place.displayName.text; }ARGeospatialCreatorAnchorin your scene as a prototype for creating anchors, one per place in the Places API result. - Use the new Create New Anchors from Places Response menu item in Google AR Codelab to create the anchors.
- You should see multiple anchors appear in the Hierarchy pane.
Verify the anchor's positions
To verify that all the assets are anchored in the correct locations before you run the app, follow these steps:
- Click an added anchor in the Hierarchy pane.
- Press F.
- Inspect the anchor in the
Sceneview. - If an anchor isn't in the correct location, click Snap to Tile, or manually change the
Latitude,Longitude, orEditor Override Altitudevalues.
6. View the asset in AR
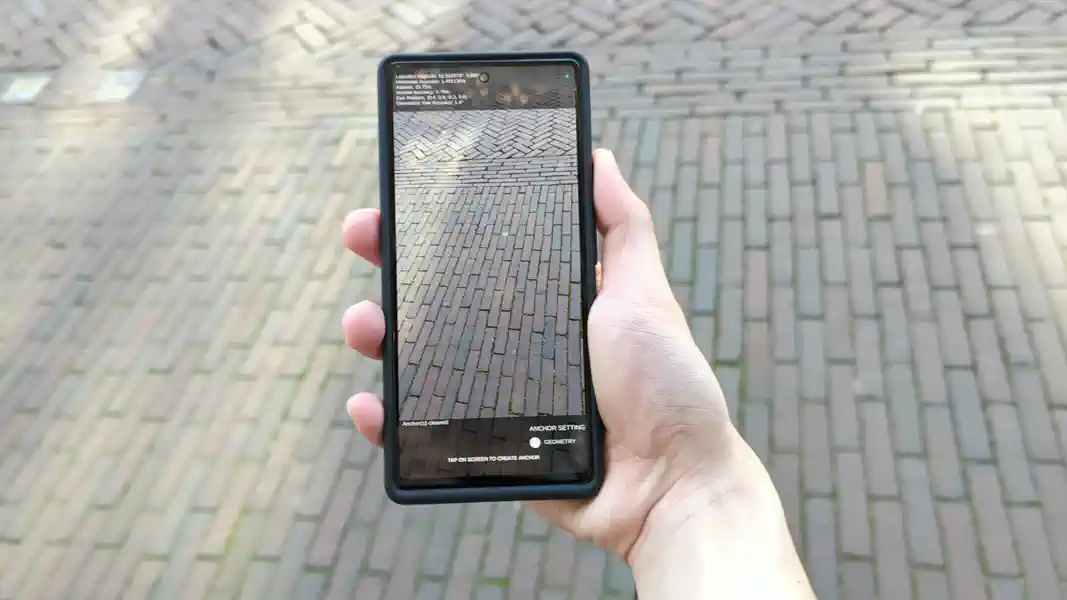
To view the asset in AR on your ARCore-supported Android or iOS device, follow these steps:
- Click File > Build Settings, and then select either the Android or iOS build platforms.
- Click Switch platform.
- Ensure that your development device is connected and configured for development.
- Click Build and run.
- Confirm that the app runs on your device.
- Visit the locations where you anchored the content. If you didn't change the examples, the locations are public libraries in San Francisco.
7. Conclusion
Congratulations! You wrote a Unity app that uses Geospatial Creator and the Google Maps Platform Places API to create multiple geospatial experiences using an initial template. We hope you can use this knowledge to extend the reach your Geospatial Creator content can have!